How to install mobile presets on Adobe Lightroom app
Here’s how to install mobile presets on your Adobe Lightroom app so you can start editing amazing photos on the go.
My Lightroom mobile preset pack ‘warm days‘ is now available to purchase on my shop. If you’re interested in desktop presets, they’re available here too.
1. Download ‘Adobe Lightroom: Photo Editor’ on your device
Simply search ‘Lightroom‘ on your app store. Adobe Lightroom is absolutely free to download on your mobile devices on both Android and Apple. Make sure you have the app ready to go before you start to install mobile presets!
2. Download or transfer the DNG files onto your device
Mobile presets always come in DNG file format. It’s recommended to purchase and download mobile presets on your computer. If you’ve done that already, you should already have the files on your computer (individually or in a ZIP folder).
If you’re an Apple user like me, you can simply Airdrop the DNG files to your phone directly from your Mac. They will show up on your camera roll. If not, you can store the files on a file sharing service like Dropbox or Google Drive, then access them on the mobile app to download them straight on your phone.
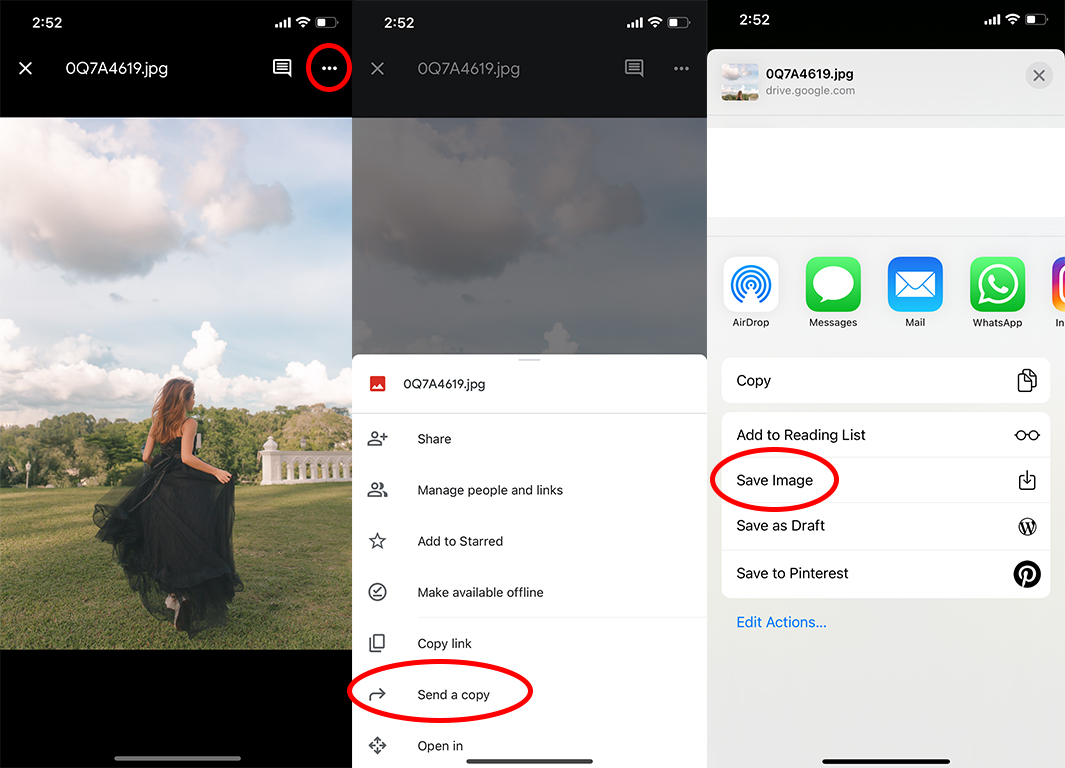
For Google Drive: Open the DNG file you want to download. Tap on the ‘…‘ button on the top right hand corner, then ‘Send a copy‘, and ‘Save Image‘.
3. Import DNG files into your Lightroom app
Now, what’s left to do is to import the DNG files into your app and save the edit settings as your new presets!
If you bought my ‘warm days’ mobile presets, you won’t be able to preview the DNG files on your camera roll. Don’t worry! This is normal. Just select each of the ‘blank’ photos onto the app following the instructions here!
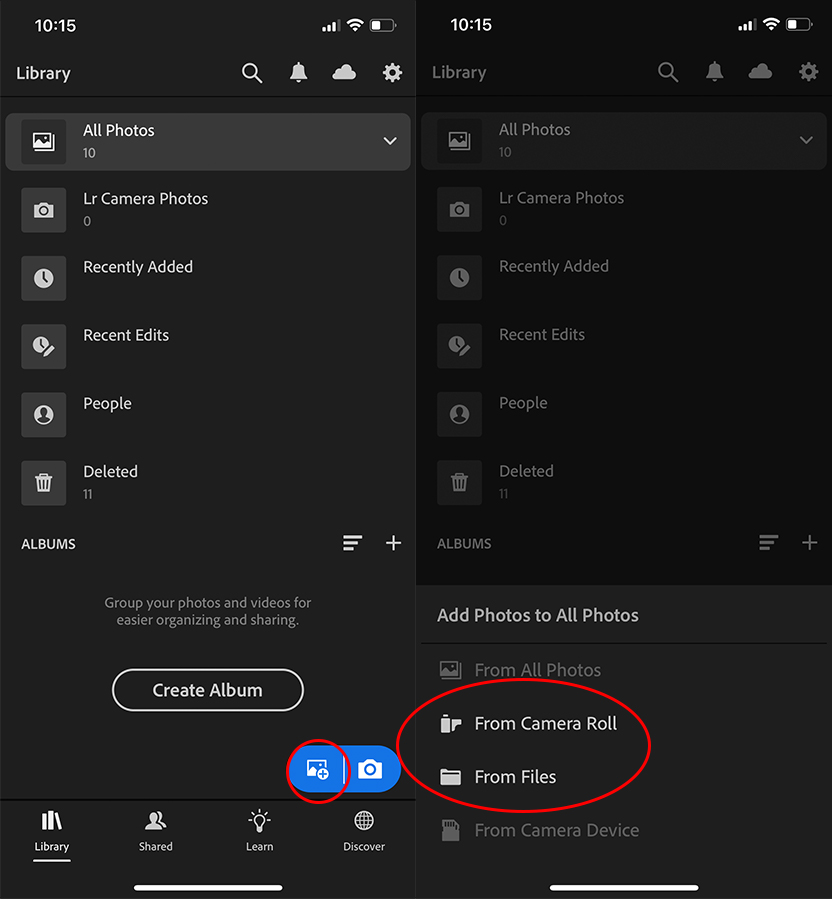
Open your Lightroom app and tap on the picture icon on the bottom right hand corner to import new files. Then select the DNG file from your camera roll. You should only select one at a time so you can save the presets individually!
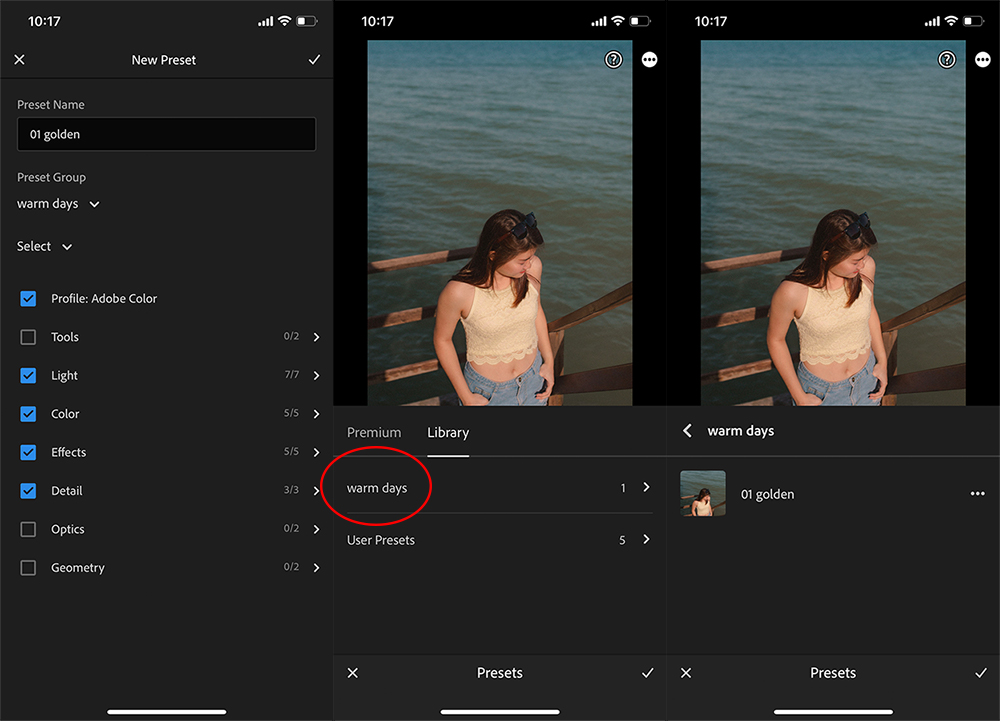
4. Create a preset from the file and save it
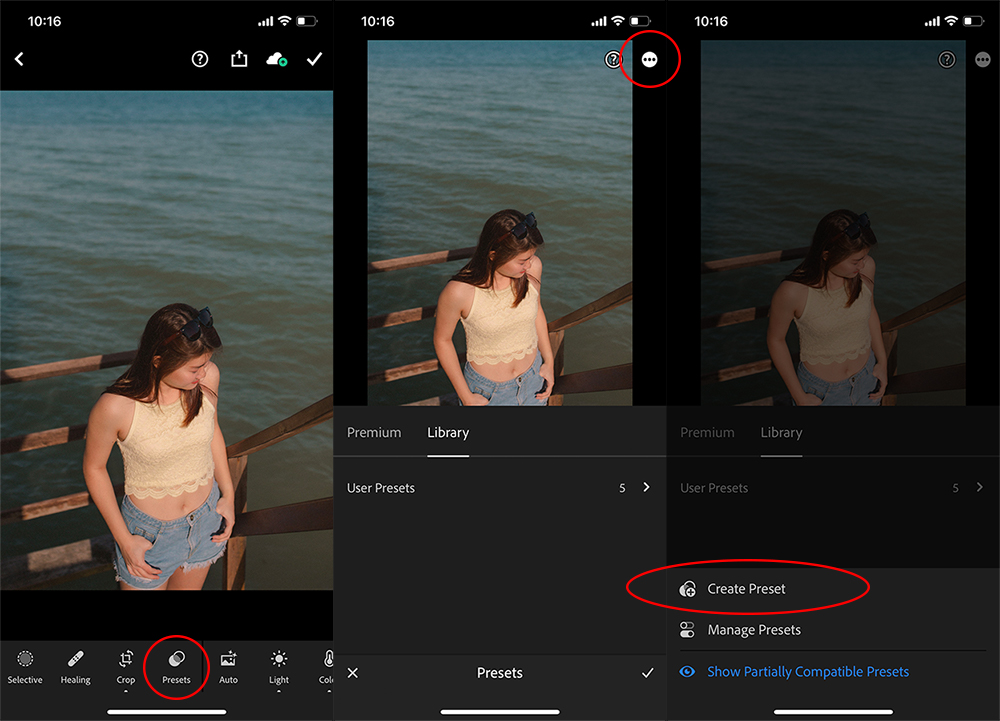
Once you’ve opened the DNG file on Lightroom, tap the ‘…‘ button on the top right hand corner and select ‘Create Preset‘. This allows you to save all the edit settings from the file as a new preset.
A checklist will appear, but the default settings should be alright and you don’t have to change anything. You should see that everything is checked except ‘Tools‘, ‘Optics‘, and ‘Geometry‘. You can then name your preset and add it to a preset group. I recommend creating a preset group for every preset pack you download so it’s more organised!
If you’ve purchased my ‘warm days‘ preset pack, I’d create a preset group named ‘warm days‘, and save the respective presets within the group.
After you’re done, tap on the tick on the top right hand corner, and you’re good to go! Repeat steps 3 and 4 for each DNG file you’ve downloaded because you have to save the presets individually.
5. Get editing with your new mobile presets!
Import any photo from your camera roll, and tap on the ‘Preset‘ button on the bottom panel to access your presets. You should see your saved presets under ‘Library‘ and (if applicable) within the preset group you saved them in.
Simply tap through the presets to see how they look on the photo. You may make further adjustments to the photo until you’re happy with the final result! Then export and you’re done!
Use #jtwongggpresets when you use my presets so I can see them. Follow me @jtwonggg.photography for announcements when I release more presets!